Initial Setup of my Raspberry Pi cluster
Written by: Kimberlee Model, posted: 2017-05-27, last modified: 2019-09-30. Tags: How I configured, Home Server, Raspberry Pi.This post is going to be the introduction to my my Raspberry Pi Cluster. As mentioned in my introduction post, I have a bit of an interest in home servers and home automation. Currently I'm running a single Rasberry Pi 3, that is not powerfull enough to run MySQL, Apache Tomcat, and a Minecraft server, as well as a few infrastructural items. I will separate each application into 4 devices: one for Tomcat, one for MySQL, one for my Minecraft Server, and one last for infrasturctural items: DNSMasq, what ever items necessary for running the radio and perhaps OpenLDAP.
My original plan formed about 9 months ago, during a Computer Aided Drafting class. Well, it actually started a while before that. I should start with this super freakin old radio header. Its a Panasonic RE-7671C that my dad and I found a while ago, It didn't work great, so we cleaned it up, and he replaced a few components and redid some solder points, something like that. I was too young at the time to know what he was doing. Now I'm older, and parts of it are again starting to fail, the left speaker does not work, and the right sounds a bit fuzzy. So the plan is to take it apart, remove the failing electronics, and replace it with modern electronics. Except that there would be a lot of space left over inside it, so I intend to stuff a bunch of Raspberry Pis into it so that it will be more than just a radio. And thats where the CADD class comes into play. I modeled most of the structure in CADD, so that I can better plan my modifications to it.
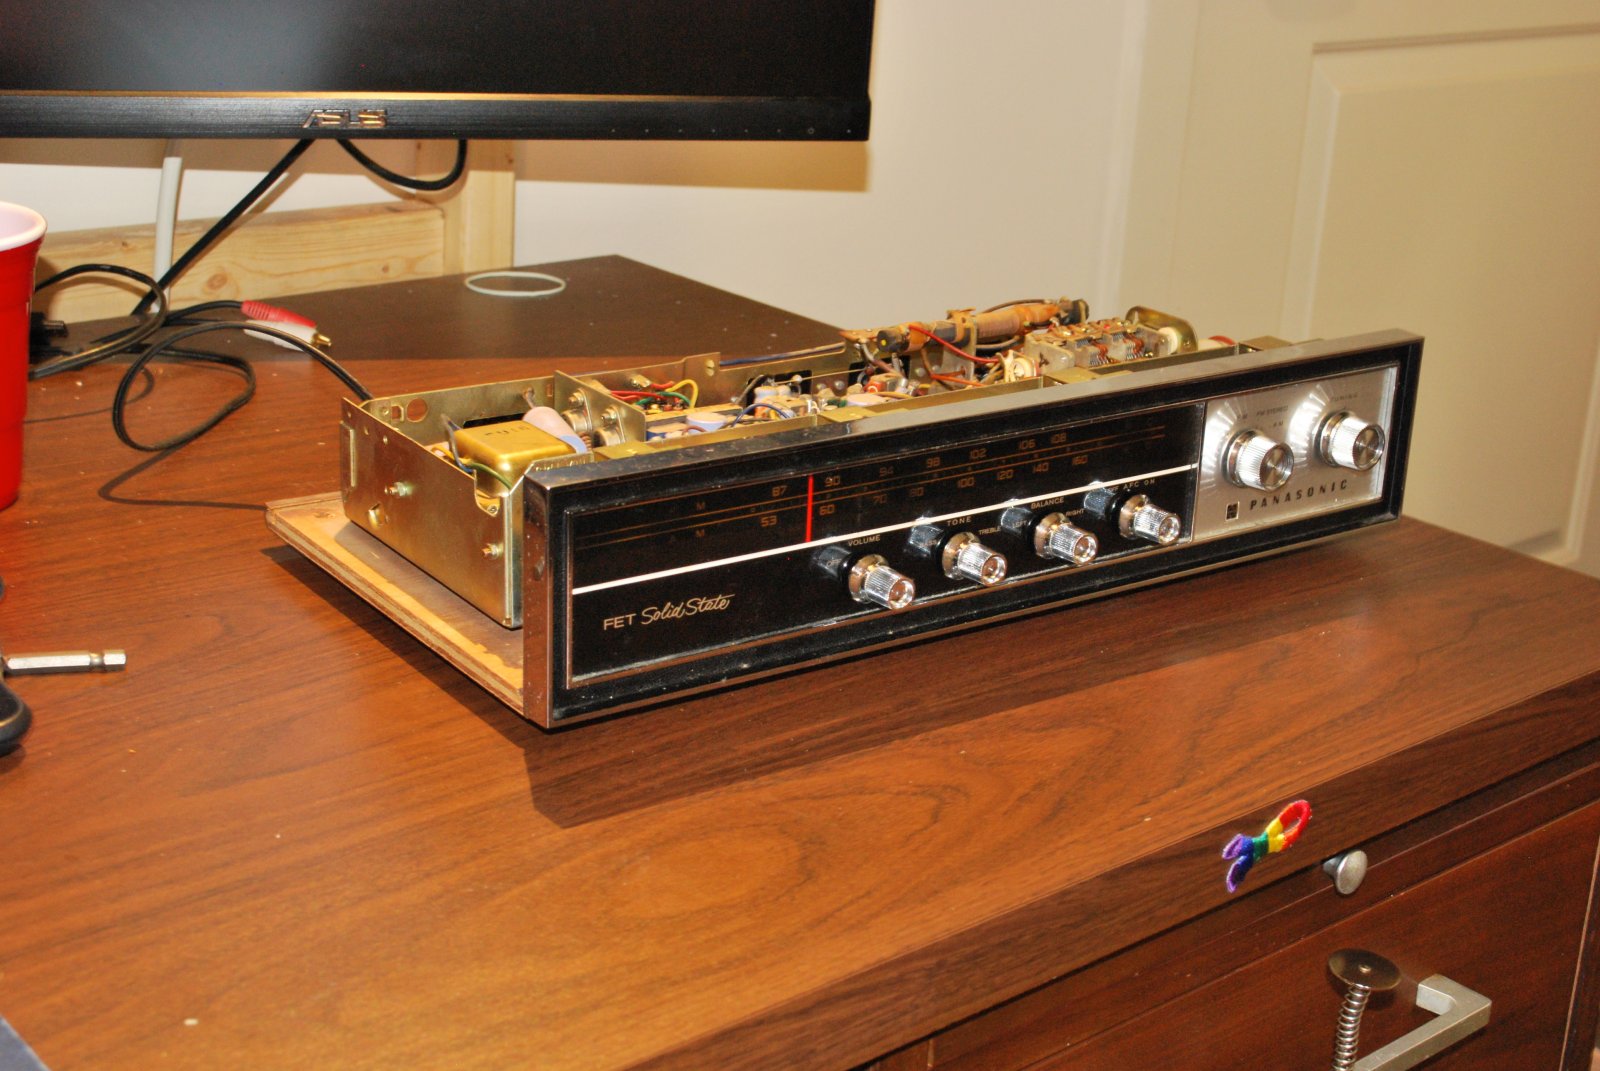
So the plan is to take it apart, remove the failing electronics, and replace it with modern electronics. Except that there would be a lot of space left over inside it, so I intend to stuff a bunch of Raspberry Pis into it so that it will be more than just a radio. And thats where the CADD class comes into play. I modeled most of the structure in CADD, so that I can better plan my modifications to it. So far, the results of the CADD shows that I can fit four Pis, a network switch, and a USB power supply, with additional space for the remaining items to function as the radio. Since I haven't completed the design of the radio enclosure, I will leave it intact, and simply leave the Pis free standing. The Repository for my CADD is here.
Aaaaannnyy ways, This post is more about the Raspberry Pis. I will have four, 3 with 32 Gb microSD cards, and one with a 16Gb. I would have got one more 32Gb, but. um. I miscounted, so I have to keep one that I had... One Pi, the one with Tomcat, will additionally have a mdadm RAID 10 array of 32Gb flash drives. This will mainly be for storage of my Git repositories. But also for two backups of my Minecraft server and the MySQL server.
For the Operating system, I will run Raspbian "Lite" (a version of Rasbian that runs headless without a GUI). As the "default" Raspberry Pi operating system, it is also likely to be the most stable. The first thing to do once the operating system is installed, is to replace the default user, and give it all the same groups as the pi user. As root I did the following. It will create the named user with an initial group of the same name.
Well, actually the first thing was that I had to switch the keyboard layout from UK English to American English, because even though I switched the installer to US english. This is pretty easy with raspi-config a handy TUI tool that comes with Raspbian, run as root of course.
$ adduser kimee
I also need to move all the groups from pi to kimee
    $ groups pi
    pi : pi adm dialout cdrom sudo audio video plugdev games users input netdev spi i2c gpio
    $ groups kimee
    kimee : kimee
This shows the differences between the groups. Now I don't want to add pi to the new user, because I will be deleting that group later.
$ usermod -G "adm,Now I want to delete the pi user and group. This is easy. First log out of pi, and log in as my new user. Then as root do the following.
$ deluser --remove-home pi
The last thing to do is to setup the host name and a static IP address. For the hostname, It can easily be done with the raspi-config tool, And while I'm in there I'm also enabling SSH access. Now, setting up the static IP is a little harder. It involves editing the /etc/dhcpcd.conf file. It's configuration daemon for DHCP. I'm not sure entirely how it works or what it does, but I added the following lines to the original, nearly empty, config fi.e
#the interface to act on
interface eth0
# this static IP Address (192.168.2.50) to take, and the subnet range (24)
static ip_address=So that forms the basis for what I will be doing to each Pi. And that also concludes this entry.
Well, actually, as I was concluding I thought that I should probably ensure that wifi and bluetooth are completely disabled. So I did some googling, and it seems to be that there are a few lines that can be added to the /boot/config.txt file.
dtoverlay=Now reboot. You can ensure that they are off by issuing the following commands.
    $ ip addr
    $ bluetoothctl
    # list
    # exit
The ip addr command will list the active network devices, if wireless is disabled, you will see only lo the loopback device and eth0 the ethernet device. for bluetooth, the bluetoothctl command will open a special bluetooth shell. Issue the list command to list available devices. There should be none. And exit will close the bluetooth shell.
Ok. Now I'm done.